|

3.7 The Picture Display
The
functions of the picture display are always available when you can
see a picture. Move the mouse pointer to the picture and press the
right-hand mouse button to open a context menu.
The reference list
 |
|
 continue continue |
|
|
|
|
|
|
| 1. Menu |
|
|
|
|
|
|
|
|
The reference list contains at most 16 pictures
and is used for comparative viewing in the double and overview
display
1. In the context menu related to the picture (right-hand
mouse button), you can add a picture to the reference list or
remove one. In addition, you have the option of deleting the entire
reference list.
|
Change display size
|
|
 |
|
|
|
|
|
|
| 1. Whole Picture |
|
1. Original size |
|
|
|
|
|
|
The
function "Whole picture/Original size" shows a digital picture
in different sizes.
1. "Whole picture" displays the picture zoomed to screen size.
2. Original size displays the picture in its true pixel
size, in other words one pixel of screen resolution is equal to
one pixel of the scan. |
Modify display
 |
|
 |
|
 |
|
|
|
|
| 1. Contrast |
|
2. Sharpness |
|
3. Brightness |
|
|
|
|
Three
options are available for temporary picture processing.
1. "Increase contrast" can prove useful when viewing written
documents.
2. "Increase sharpness" is used to better distinguish lines in
fine line drawings, for example.
3. "Increase brightness" enables you, for example, to better study
shaded areas whose fine nuances are not visible to the human eye
under normal circumstances. |
Double display
 |
|
|
|
|
|
|
|
|
| 1. Double picture |
|
|
|
|
|
|
|
|
In
the double display mode, two pictures are always shown next to
each other, just like a double projection in a lecture. However,
the left-hand picture remains in place and only in the right-hand
half of the display can you scroll through previously marked pictures.
The fixed left-hand picture can at all times be exchanged for
the picture just appearing on the right. This means that all pictures
can be compared with each other. To be able to start the double
display, a picture must be currently displayed and you must have
previously marked other pictures.
1. Start the double picture display with the appropriate item
in the context menu. With "Arrow up/down", scroll through the
reference list on the left. "Arrow left" moves the right-hand
picture to the left as a fixed point. All of the functions of
picture display are available.
|
Overview display
 |
|
|
|
|
|
|
|
|
| 1. Overview |
|
|
|
|
|
|
|
|
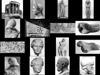
The
overview display shows all of the pictures currently saved in
the reference list.
1. Call up the overview display via the respective item in
the context menu. All of the functions of picture display are
available.
|
|
|
|
|
|
|
copyright 2001 by Verlag Biering & Brinkmann
|
|
Postfach 45 01 44, D-80901 München
|
|
|
|
|
|
;)
;)
;)
;)
;)
;)
;)
;)
;)
;)
;)